
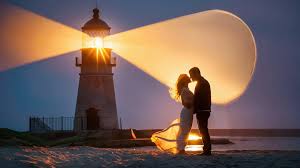
Ever watched a film or a digital video and thought, Wow, that light looks unreal, but somehow so natural? That’s the magic of lens flares, and one tool that’s making waves for creators is Photeeq Lens Flare. Whether you’re editing cinematic videos or designing high-end graphics, lens flares can add that cinematic punch. They mimic the effects you see when bright light hits a camera lens, giving a scene drama, realism, or even a touch of fantasy.
Now, I know what you’re thinking—Do I really need another plugin? Well… yes, if you want to bring professional-grade visual effects without spending hours tweaking. Photeeq Lens Flare is designed to simplify the process while offering enough flexibility for creative freedom. And then there’s the interface—it’s surprisingly intuitive. I remember trying my first flare project with a different software, and I spent forever adjusting, deleting, and starting over. With Photeeq, it just clicked. You can see results almost instantly.
This guide dives into everything about Photeeq Lens Flare—from installation, features, customization, and practical tips to integrate it seamlessly into your projects. Along the way, we’ll explore why creators rave about it, the different types of flares you can achieve, and how to push the tool to its limits without overdoing it. By the end, you’ll not only understand the plugin technically but also creatively.
What Is Photeeq Lens Flare
Simply put, Photeeq Lens Flare is a visual effects plugin for designers, video editors, and motion graphics artists. It simulates realistic lens flares that occur when light interacts with a camera lens. But it’s not just a filter—you get control over intensity, angle, color, and shape. You know how sometimes flares look generic or fake? With this tool, you can avoid that. The software’s algorithms mimic the imperfections and nuances of real-world lenses, making the effects convincingly natural.
Installation And System Requirements
Installing Photeeq Lens Flare is fairly straightforward. Download the latest version, run the installer, and integrate it with compatible editing software. Make sure your system meets the minimum requirements—usually, a decent GPU, sufficient RAM, and supported OS versions. Honestly, I once tried running a complex flare effect on a basic laptop, and… let’s just say, patience wore thin. Performance matters. With the recommended setup, you can experiment with multiple layers of flares without lag.
Types Of Lens Flares You Can Create
Here’s where things get fun. Photeeq Lens Flare offers multiple flare types—circular, streaks, ghosting, anamorphic, and more. You can mimic sunlight hitting a camera or neon lights in a night scene. Each type has adjustable parameters. Personally, I love mixing subtle streaks with slight circular flares—it adds depth without looking overdone. The key? Less is sometimes more. Overly exaggerated flares can distract the viewer, rather than enhance the scene.
Customization Options And Control
One thing I noticed when first experimenting is how much control you get. Brightness, saturation, lens distortion, halo effects—everything can be tweaked. And then there’s the animation option, which is super handy for motion graphics. If you want a flare to follow a moving light source, you can animate it smoothly. The interface allows you to preview in real-time, which is a lifesaver. Nothing worse than rendering for minutes, then realizing the effect was off.
Practical Uses In Video Editing
Video editors will find Photeeq Lens Flare incredibly useful. Adding a subtle flare during a sunset scene, enhancing headlights in a car chase, or emphasizing a magical light source—all become simple tasks. One time, I was working on a short film, and a slight lens flare from a window added an emotional layer I hadn’t planned. It was subtle, almost unnoticed consciously, but it made the scene feel warmer and more alive. That’s the power of lens flares.
Graphic Design And Motion Graphics Applications
Beyond video, graphic designers can leverage Photeeq Lens Flare to enhance promotional content, social media visuals, or UI animations. You can create glowing buttons, dynamic text overlays, or animated light effects that grab attention. And here’s a tip—combining flares with shadows and depth maps gives a three-dimensional feel to otherwise flat graphics. I’ve experimented with that on some poster designs, and the results are surprisingly cinematic.
Tips For Realistic Lens Flare Effects
Realism is key. Avoid placing flares where light wouldn’t naturally hit a lens. Play with intensity and opacity—most beginner mistakes involve overdoing it. Another trick? Color grade the flare to match your scene. If your environment has warm tones, a cold blue flare might look jarring. And then… remember that subtlety often makes viewers subconsciously feel wow rather than ouch, that’s fake.
Common Mistakes And How To Avoid Them
Even experienced users can slip up. Oversized flares, static placement, or ignoring light direction are common errors. The plugin gives control, yes, but it’s easy to get carried away. Personally, I learned the hard way in one project—my epic cinematic scene looked like a disco party because I cranked intensity without thinking. The lesson? Step back, preview, and adjust gradually.
Combining Photeeq Lens Flare With Other Effects
Pairing lens flares with glows, bloom, or light leaks can amplify the visual impact. For instance, adding a subtle bloom around a flare can make a bright sun feel blindingly real. Or, if you’re creating sci-fi visuals, combining ghost flares with neon highlights elevates the futuristic feel. Experimentation is key. I spent hours layering effects in one project, and the final composition felt alive—like the scene was actually lit by those light sources, not just digitally crafted.
Future Of Lens Flare In Digital Media
With tools like Photeeq Lens Flare, digital creators can achieve effects previously only possible with high-end cameras or expensive setups. The future? More integration with AI-driven color grading, automated light detection, and adaptive flare effects. Imagine a flare that automatically adjusts as your scene’s lighting changes—no manual tweaking. We’re not there yet fully, but plugins like Photeeq are definitely paving the way.
Conclusion
Whether you’re a video editor, motion graphics artist, or digital designer, Photeeq Lens Flare is a powerful tool to elevate your visuals. Its versatility—from subtle sunlight effects to dramatic cinematic flares—makes it indispensable. Remember, subtlety often wins, but the customization options allow bold experimentation when needed. With some practice, this plugin doesn’t just add light—it adds emotion, depth, and realism to your creative work.