
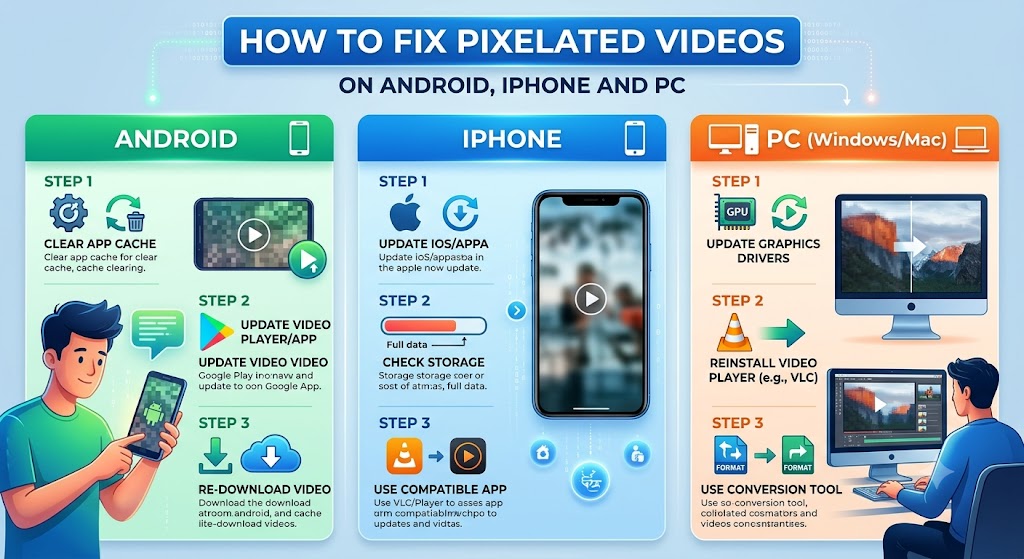
A video can look sharp when you record it but become pixelated after sharing it on WhatsApp, uploading it to social media, downloading it from the internet, or transferring it between devices. Sometimes, the problem appears only during playback, while in other cases, the footage looks permanently blurry, blocky, or distorted. Understanding the cause is the first step toward finding the right solution.
If you are wondering how to fix pixelated video footage, you do not always need expensive editing software or a professional video repair service. Simple steps such as checking the original file, improving playback quality, disabling unnecessary compression, or exporting the video with suitable settings can make a noticeable difference. The correct method depends on whether the problem comes from the video file, your internet connection, the editing process, or your device.
For example, a video that looks blurry while streaming may become clear when downloaded in its highest available quality. A video that becomes pixelated after being sent through a messaging app may require the original file to be shared again. Meanwhile, footage recorded at a very low resolution may benefit from sharpening or AI upscaling, although the original details cannot always be recovered.
This guide explains how to fix pixelated videos on Android, iPhone, Windows, and Mac using practical, free-first methods. You will learn how to identify different types of pixelation, improve video clarity, choose appropriate export settings, and avoid quality loss when recording or sharing videos.
What Is a Pixelated Video?
A pixelated video contains visible square-shaped blocks, jagged edges, or patches where fine details should appear. Instead of seeing smooth outlines and clear textures, you may notice that faces look blocky, text becomes difficult to read, or moving objects lose their definition.
Pixelation is often associated with low resolution or excessive compression. However, a video can also appear pixelated because of poor streaming quality, an unsuitable playback setting, an incomplete download, or damage to the file.
The distinction matters because these problems do not all require the same solution. Increasing a video’s resolution will not necessarily fix a damaged file, while changing your internet connection will not restore details that were permanently removed during compression.
Pixelation vs Blurriness vs Video Noise
These visual problems can look similar on a small screen, but each has different characteristics.
| Problem | What it looks like | Common cause | Best first step |
| Pixelation | Visible square blocks and rough edges | Low resolution or heavy compression | Find the original or higher-quality file |
| Blurriness | Soft details and unclear outlines | Focus problems, motion blur, or low resolution | Check the original footage and apply mild sharpening |
| Video noise | Grainy or speckled appearance | Low light or high camera sensitivity | Use denoising carefully |
| Buffering-related quality loss | Video temporarily looks poor or changes clarity | Adaptive streaming | Check internet speed and playback quality |
| Compression artifacts | Blocky patches, smearing, or banding | Excessive compression | Re-export from the best available source |
| Corrupted video | Freezing, visual glitches, missing frames, or playback errors | Incomplete transfer or file damage | Obtain another copy or use video repair methods |
A video may have more than one problem. For example, footage recorded in a dark room can contain noise, while a messaging app adds compression artifacts during sharing. In such cases, correcting one issue may improve the result without completely eliminating the others.
Why Do Videos Become Pixelated?
Before trying multiple editing tools, identify when the video becomes pixelated. The timing often reveals the cause and helps you avoid unnecessary work.
1. The Original Video Has Low Resolution
Resolution describes the number of pixels used to display a video. Common formats include 480p, 720p, 1080p, and 4K. A video recorded or downloaded at a low resolution may look acceptable on a small phone screen but appear blocky when enlarged on a laptop or television.
For example, a 360p clip stretched across a large monitor must use the available pixels to fill a much bigger display area. The player may scale the image, but scaling cannot create all the missing details.
What to do: Find the original recording or download a higher-resolution version from the legitimate source, if available. If neither is available, try careful upscaling and sharpening while understanding that the improvement may be limited.
2. The Video Was Compressed Too Aggressively
Video files are often compressed to reduce their size. Compression is useful for sharing and storage, but excessive compression can remove visual information and introduce block-shaped artifacts.
This can happen when you export a video using a very low bitrate, upload it to a platform that processes videos, or repeatedly save and share the same compressed file.
For instance, editing a downloaded clip, exporting it at a low bitrate, sending it through a messaging app, and downloading it again may produce a noticeably worse result than sharing the original export.
What to do: Start with the highest-quality source available and export it once using suitable settings. Avoid repeatedly compressing the same file.
3. The Internet Connection Is Reducing Streaming Quality
Streaming platforms often adjust video quality according to available bandwidth, network stability, device performance, and playback conditions. If your connection slows down, a video may temporarily switch to a lower resolution.
You may notice that the video becomes blurry during playback and gradually becomes clearer when the connection improves.
What to do: Pause playback briefly, check your connection, and manually select a higher quality option if the platform provides one. If a downloaded version is available, compare it with the streamed video.
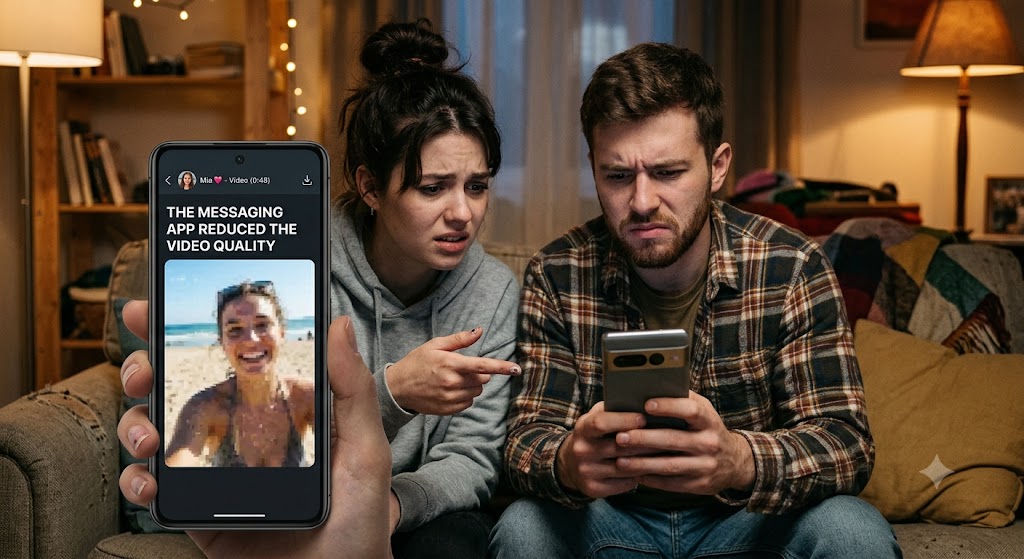
4. The Messaging App Reduced the Video Quality
Many messaging and social media platforms process uploaded videos to reduce file size and make playback faster. Depending on the service and sharing method, the resulting video may have lower resolution, bitrate, or detail than the original.
A clip recorded in 1080p can look considerably worse after being sent using a standard media-sharing option.
What to do: Use the platform’s available high-quality media setting or send the original video as a file or document when supported. The exact options vary by app and version.
5. The Video Was Enlarged or Cropped Too Much
Cropping removes part of the original frame. If you crop a small area and enlarge it to fill the screen, the remaining pixels must cover a larger space. The result can look soft, jagged, or pixelated.
Digital zoom can create a similar problem because it enlarges a portion of the image rather than capturing additional optical detail.
What to do: Return to the uncropped source, reduce the amount of digital zoom, or use a higher-resolution original. If you cannot access the source, moderate upscaling may improve how the clip looks.
6. The Export Settings Are Unsuitable
A video editor can produce poor output even when the original footage is clear. Exporting at a lower resolution, using a very low bitrate, or choosing unsuitable compression settings may introduce visible artifacts.
The issue can also occur when the timeline resolution is much lower than the source resolution.
What to do: Check the project resolution, frame rate, codec, and bitrate before exporting. Match the output resolution to the intended use and the quality of the source footage.
7. The Video File Is Incomplete or Corrupted
If a video suddenly develops colored blocks, freezes, missing sections, or severe visual glitches, the problem may involve file corruption rather than ordinary low quality.
An interrupted download, failed transfer, damaged storage device, or incomplete copy can cause playback errors.
What to do: Download or transfer the file again, preferably from the original source. If the original is unavailable, try a different compatible player or a reputable video repair utility.
How to Fix Pixelated Videos Quickly
If you want to fix pixelated video footage without spending time testing numerous applications, start with these basic checks.
Step 1: Open the Original Video
Locate the video in the device or folder where it was first recorded or downloaded. Compare it with the version that looks pixelated.
If the original is clear, the problem was probably introduced during editing, sharing, downloading, or playback. You can then work from the original rather than trying to repair a damaged copy.
If the original is also pixelated, the issue may have been present during recording or introduced earlier in the file’s processing history.
Step 2: Check Whether the Problem Occurs in Another Player
Open the same video in another trusted media player or on another device. If it looks clear elsewhere, the problem may be related to the original player’s settings, decoding, hardware acceleration, or display scaling.
Do not assume the file is damaged simply because one application displays it incorrectly.
Step 3: Select the Highest Available Streaming Quality
If the problem occurs only when watching an online video, open the quality settings and select a higher resolution if available. Check whether the connection is stable and allow the video to buffer.
Remember that selecting 1080p does not guarantee a 1080p-quality source. Some videos were originally uploaded at lower resolutions, and a player cannot restore details that were never present.
Step 4: Stop Repeatedly Compressing the Video
Avoid sending the same clip through multiple apps or exporting it repeatedly at low quality. Use the best available original file and create one final export with suitable settings.
If the clip is already heavily compressed, re-exporting it at a higher bitrate will not restore the details that were previously removed.
Step 5: Try Mild Sharpening or Upscaling
If the video is still too soft, try a free editor that offers sharpening, denoising, or resolution scaling. Make small adjustments and compare the result with the original.
Too much sharpening can produce bright outlines around objects, amplify noise, and make faces look unnatural. Upscaling can increase the output dimensions, but the visual improvement depends on the source and the algorithm used.
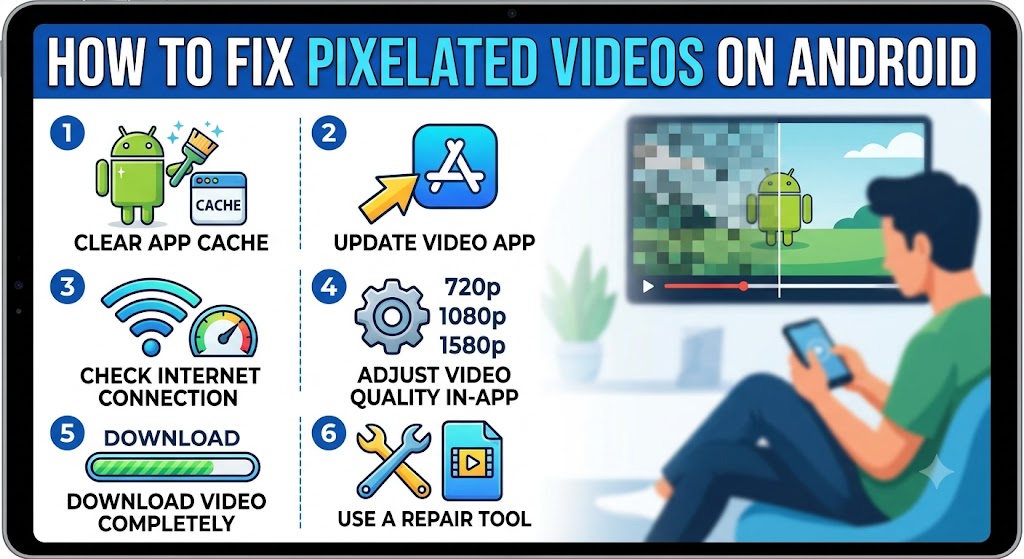
How to Fix Pixelated Videos on Android
Android phones include different cameras, gallery apps, media players, and editing tools. The exact menu names may vary by manufacturer, Android version, and installed application. Nevertheless, the following methods work as a practical troubleshooting sequence.
Method 1: Check the Video in Your Gallery
Start by opening the video in your phone’s default Gallery or Photos app.
- Locate the video in the folder where it was recorded or downloaded.
- Play it from the beginning and inspect both still scenes and moving sections.
- If the video was received through a messaging app, look for the original file in the sender’s conversation or ask the sender to share it again.
- Compare the file with another copy, if available.
- If the video looks clear in the gallery but pixelated in another app, investigate that app’s playback or streaming settings.
This simple test helps separate a file-quality problem from an application-specific issue.
Method 2: Improve Streaming Quality
If an online video looks blurry on your Android phone, the application may be reducing its playback quality.
- Check whether other websites and apps are loading normally.
- Switch between Wi-Fi and mobile data to see whether the connection makes a difference.
- Open the video’s playback or quality menu.
- Select the highest available resolution that your connection can handle.
- Pause the video briefly if it needs time to buffer.
- Compare the result after playback stabilizes.
If the video remains pixelated even at the highest available quality, the uploaded source itself may be low-resolution or heavily compressed.
Method 3: Share the Video Without Unnecessary Compression
When you send a video through a messaging application, the standard media option may process it to reduce its size.
To preserve more detail:
- Open the conversation in the messaging app.
- Check whether a high-quality media option is available.
- Select the highest quality setting supported by the app.
- If supported, send the video as a file or document rather than ordinary compressed media.
- Ask the recipient to download the original file instead of saving a preview or forwarded copy.
The exact procedure differs between applications. File-sharing options may also have size limits, so check the app’s current restrictions.
Method 4: Use a Free Android Video Editor
A video editor can help when the footage is slightly soft, noisy, or poorly exported. Many mobile editors offer some combination of sharpening, brightness adjustment, contrast control, cropping, and resolution selection.
Use this workflow:
- Import the highest-quality copy of the video.
- Duplicate the project or keep the original file untouched.
- Apply light sharpening if the edges look soft.
- Adjust brightness and contrast only if the image is poorly exposed.
- Use denoising if the footage contains visible grain.
- Avoid excessive cropping or digital zoom.
- Export at the original resolution or a suitable resolution for your intended platform.
- Compare the exported video with the original.
Free features vary by application, and some editors reserve particular enhancement tools for paid plans. Check the export options before spending time editing.
Method 5: Check Available Storage and App Performance
A slow or overloaded device can struggle to decode high-resolution video smoothly. This may cause stuttering or playback problems that resemble poor video quality.
Try closing unnecessary applications, restarting the phone, and checking available storage. Update the video player or editing app if an update is available.
If only one player has trouble, test the video in another compatible player before making changes to the file itself.
Method 6: Record Future Videos at Better Settings
If videos recorded on your Android phone look pixelated from the start, check the camera settings.
- Open the Camera app.
- Switch to video mode.
- Open the video resolution or quality settings.
- Select a suitable resolution, such as 1080p, if your phone supports it.
- Choose an appropriate frame rate for the scene.
- Clean the camera lens.
- Record in good lighting and avoid unnecessary digital zoom.
- Play back a short test recording before capturing important footage.
Higher resolution is not automatically better in every situation. Recording at 4K can consume more storage and processing power, while good lighting and stable framing can improve the appearance of footage at 1080p.
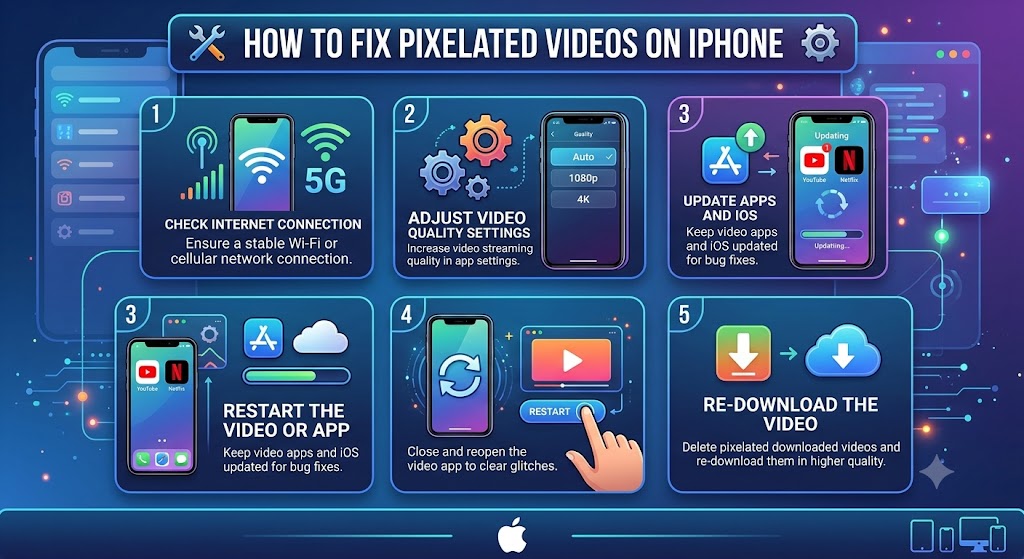
How to Fix Pixelated Videos on iPhone
An iPhone video can become pixelated because of low recording quality, compression during sharing, streaming problems, or editing and export settings. Use the following steps to determine where the quality loss occurred.
Method 1: Compare the Video With the Original in Photos
Open the video in the Photos app and inspect it at normal playback size.
If the video was imported from another app, downloaded from a website, or received through a messaging service, compare it with the original source if possible.
If the original recording looks clear in Photos but the shared copy looks pixelated, focus on the transfer or compression process rather than trying to repair the original recording.
Method 2: Check Camera Recording Settings
To improve future recordings:
- Open Settings on your iPhone.
- Find Camera.
- Open the Record Video section.
- Choose an available resolution and frame rate appropriate for your needs.
- Return to the Camera app and record a short test clip.
The available options depend on your iPhone model. Higher-resolution and higher-frame-rate recordings generally require more storage, and some advanced recording formats may not be necessary for everyday clips.
For general use, 1080p is often a practical balance between quality, compatibility, and file size. If you need additional detail for cropping or editing, a supported 4K setting may be useful.
Method 3: Check iCloud Photos and Downloaded Copies
If you use iCloud Photos with storage optimization, the full-resolution original may not always be stored locally on your iPhone. The device may need to retrieve the original from iCloud when you open or edit the video.
A temporary preview or an incomplete download can make it difficult to judge the source quality.
Check your internet connection and allow the original to download before comparing or exporting the file. If the video still appears pixelated after the original is available, investigate the source file or editing process.
Method 4: Share the Video at Higher Quality
Some sharing methods compress video files or create lower-quality versions for faster delivery.
When sending an important video:
- Look for a high-quality media option in the sharing app.
- Use the original file-sharing option when available.
- Avoid repeatedly downloading and forwarding compressed copies.
- Compare the recipient’s copy with the original on your iPhone.
- If necessary, share the original through a suitable cloud storage service or another transfer method.
AirDrop can be useful for transferring files between compatible Apple devices, but always check the file received by the other device rather than assuming every transfer route preserves every property.
Method 5: Edit the Video Without Losing More Detail
If your iPhone video looks slightly soft, use an editor that offers suitable image adjustments.
- Import the original recording.
- Apply modest sharpening if needed.
- Avoid strong filters that exaggerate edges or remove natural texture.
- Minimize cropping if the subject already occupies only a small part of the frame.
- Export at a resolution appropriate for the original footage and intended destination.
- Compare the exported result with the source.
If the editor offers a choice of quality or compression, avoid the lowest setting when clarity matters. Keep in mind that increasing the export resolution does not recreate information lost in an earlier compression step.
Method 6: Troubleshoot Playback Problems
If the video looks pixelated only in a particular app, close and reopen the app, update it if an update is available, and test the same file in Photos or another compatible player.
If the file is stored online, check that it has downloaded completely. If the problem continues across multiple players and devices, the source file is a more likely cause than a single application’s display settings.
How to Fix Pixelated Videos on Windows and Mac
Desktop computers are useful for video repair because they support a wide range of media players, editing applications, and file-conversion tools. However, it is still important to diagnose the issue before changing the video.
Method 1: Test the Video in Another Media Player
On Windows or Mac, open the same video in a second trusted media player.
If one player displays the footage clearly while another produces blocks or unusual colors, the issue may involve decoding, compatibility, or playback settings.
Check whether the file plays correctly from beginning to end. If the video freezes, shows missing frames, or develops severe glitches, create a fresh copy from the original source before attempting enhancement.
Method 2: Check the Original File Properties
On Windows, right-click the video and open its Properties to inspect basic file information. Some media players and editing applications provide more detailed information, including resolution, frame rate, codec, and bitrate.
On Mac, you can inspect basic information through Finder’s Get Info window, while QuickTime Player and other compatible applications may provide additional details.
Look for the following:
- Resolution: The pixel dimensions of the video, such as 1920 × 1080.
- Frame rate: The number of frames displayed per second.
- Bitrate: The amount of data used to represent each second of video.
- Codec: The method used to encode and decode the footage.
- File size: A useful clue when comparing copies of the same clip, although size alone does not establish quality.
A low bitrate can contribute to compression artifacts, but there is no single bitrate that guarantees good quality for every video. Motion, complexity, codec efficiency, and recording conditions all affect the result.
Method 3: Re-export the Video With Better Settings
If the video became pixelated after editing, open the project in the editor used to create it, if available.
Check the timeline resolution, output resolution, frame rate, and compression settings. If the source is 1080p, exporting it at a much lower resolution may reduce detail. Exporting at 4K will not restore detail that was absent from the source.
For common 1080p footage, a starting bitrate around 8 to 12 Mbps may be reasonable for many H.264 exports, but the ideal setting depends on the frame rate, motion, content complexity, and encoder. Fast-moving sports footage may need more data than a static talking-head video.
For 4K footage, substantially higher bitrates may be appropriate. Treat any recommended range as a starting point, then compare the output at the intended viewing size.
Method 4: Use Free Video Editing Software
A desktop editor can provide more control over sharpening, denoising, scaling, and export quality than a basic gallery app.
A typical workflow is:
- Import the best available source.
- Confirm that the project resolution matches the intended output.
- Preview a detailed section containing faces, text, or moving objects.
- Apply modest sharpening only if the source is soft.
- Reduce noise if grain is distracting.
- Select a suitable export codec and quality setting.
- Render a short test before exporting the entire video.
- Compare the final file with the source.
Free software capabilities differ, and some tools place advanced AI features behind a subscription. Choose a tool based on the specific adjustment you need rather than assuming every video editor can repair every type of damage.
Method 5: Check Hardware Acceleration and System Performance
If a video displays incorrectly in one player, test another player and check for software updates. On a desktop system, graphics drivers and hardware-accelerated decoding can sometimes affect playback compatibility.
If changing playback settings resolves the issue, you may not need to edit or re-encode the video at all.
Do not disable system security features or download unofficial codec packs from untrusted websites simply to fix a single video. Prefer reputable applications and official software sources.
Method 6: Repair a Potentially Corrupted Video
If a file has missing frames, severe glitches, or playback errors, first try downloading it again or copying it from the original device.
If no clean copy exists, a reputable repair utility may be worth testing. Some tools can rebuild damaged file structures or use a reference file from the same camera to repair certain formats. Results depend on the type and severity of the damage.
Create a duplicate before attempting repair. A repair attempt should not replace your only copy of an important recording.
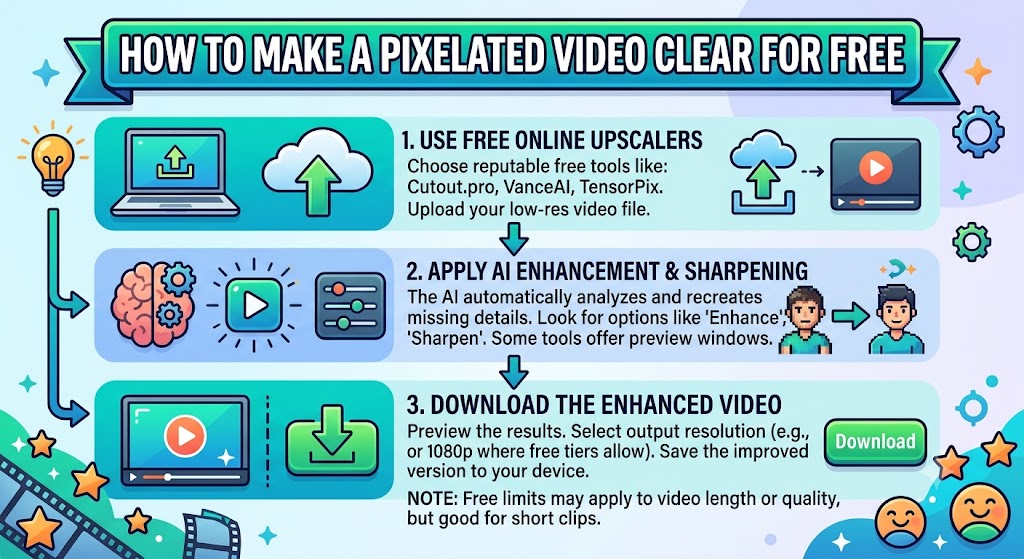
How to Make a Pixelated Video Clear for Free
You can improve many videos without purchasing an expensive editing application. The most effective free method depends on what caused the quality loss.
Method 1: Recover a Better Source
The best free improvement is often finding a better version of the same video.
Check your original camera folder, cloud storage, device backups, downloaded files, and previous transfers. If someone else recorded the clip, ask them to share the original file.
A clean 1080p source will usually provide a better starting point than a heavily compressed copy that has already lost fine detail. This approach is particularly useful for family videos, work recordings, tutorials, and social media clips.
Method 2: Adjust Sharpening Carefully
Sharpening increases local contrast around edges, which can make some footage appear clearer. It does not recreate the exact detail that compression or low resolution removed.
Use a small adjustment and inspect the result at normal viewing size. If outlines appear unnaturally bright, faces look harsh, or noise becomes more visible, reduce the sharpening.
Sharpening is most useful for mildly soft footage. It is less effective when the video is extremely pixelated or severely out of focus.
Method 3: Reduce Video Noise
Grain and digital noise can make a video look less clear, particularly in dark scenes. Denoising can smooth these distractions and improve the overall appearance.
However, strong denoising may remove hair, skin texture, fabric patterns, and other fine details. Start with a light adjustment and compare moving scenes as well as still frames.
If the footage contains both noise and compression artifacts, reducing noise may help, but it will not necessarily eliminate blocky compression patterns.
Method 4: Resize the Video With a Suitable Filter
Upscaling increases the output dimensions of a video. A resizing algorithm estimates how pixels should be displayed at the new size, which can make the video easier to view on a larger screen.
Traditional upscaling may smooth jagged edges, but it cannot reliably reconstruct missing information. A video enlarged from 480p to 1080p is still based on the original 480p detail.
If your editor offers several scaling methods, test them on a short segment. Compare text, faces, and moving edges rather than judging the result only from a static frame.
Method 5: Improve Brightness and Contrast
A video recorded in poor lighting may look muddy, washed out, or difficult to distinguish from its background. Adjusting brightness, contrast, highlights, and shadows can make the subject easier to see.
Make changes gradually. Increasing contrast too much can crush shadow details and remove information from bright areas. Excessive brightness can also reveal noise that was less noticeable in the original.
Color correction can improve visibility, but it should not be confused with resolution enhancement.
Method 6: Export at Appropriate Quality
A clear source can become visibly worse when exported with unsuitable settings. When possible, use a resolution that matches your intended output and select a codec and bitrate appropriate for the content.
For example, a short tutorial containing text and screen recordings may need settings that preserve crisp edges. A fast-moving action clip may need more bitrate to handle motion.
Avoid repeatedly exporting the same file. Make edits in one project and create a final high-quality export from the best source.
Can AI Fix Pixelated Videos?
AI video enhancement can improve the appearance of some low-resolution or compressed footage. Depending on the tool, it may upscale frames, reduce noise, sharpen edges, smooth artifacts, or estimate details that are difficult to see in the original.
However, AI cannot guarantee recovery of the original details. It may generate plausible-looking textures rather than recover information that was actually captured by the camera.
This distinction is especially important for faces, text, old recordings, and footage used for evidence or documentation.
When AI Video Enhancement Is Useful
AI enhancement may be worth testing when:
- The video has a low resolution but remains reasonably recognizable.
- Compression has softened edges without destroying the entire image.
- Mild noise makes the footage look grainy.
- An old video needs to be enlarged for modern displays.
- You need to improve the presentation of footage for a personal or creative project.
The results vary according to the source, model, video length, and processing settings. A short test clip is a better starting point than processing an entire large file immediately.
How to Use an AI Video Enhancer
The following workflow applies broadly to AI enhancement applications, although the controls and features vary between products.
- Choose a trustworthy tool. Check its supported formats, output limits, privacy policy, and whether the features you need are available for free.
- Import the best source. Avoid starting with a version that has been compressed repeatedly if a cleaner original exists.
- Select a modest enhancement level. Begin with a moderate upscale or light restoration setting.
- Preview a short section. Use a scene containing faces, text, fine textures, and motion where possible.
- Check for invented details. Look for unnatural skin texture, distorted eyes, changing facial features, or text that appears different from the original.
- Export a test. Compare the processed clip with the source at the same viewing size.
- Process the full video only if the improvement is worthwhile.
AI enhancement may take considerable processing time, particularly for long or high-resolution footage. Some tools require powerful hardware or online processing, while others restrict free exports or add watermarks. Confirm the current terms before uploading private footage or relying on a tool for a time-sensitive project.
Is AI Upscaling Better Than Traditional Upscaling?
Neither method is universally better.
Traditional upscaling uses mathematical interpolation to resize an image. It is predictable and can be useful when you simply need a larger output. AI upscaling attempts to estimate additional visual detail based on patterns learned during training.
AI may produce a more visually detailed result, but it can also introduce inaccurate textures or alter small features. Traditional scaling may look softer but preserve a more conservative representation of the source.
For ordinary personal videos, compare both methods on a short segment. For archival, journalistic, legal, or scientific footage, preserve the original and avoid presenting AI-generated detail as verified evidence.
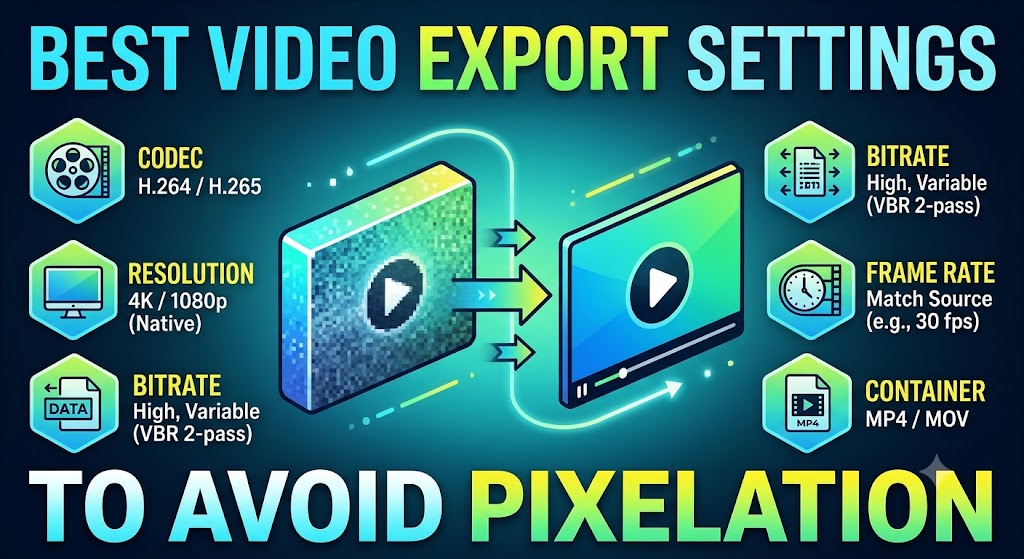
Best Video Export Settings to Avoid Pixelation
There is no single export preset that works for every video. The appropriate settings depend on the source footage, intended platform, frame rate, codec, and file-size requirements.
The following table provides practical starting points for common use cases.
| Use case | Suggested resolution | Codec option | Quality guidance |
| Everyday phone video | 1080p | H.264 | Use a moderate to high quality setting |
| High-detail footage | 4K, if originally recorded in 4K | H.264 or HEVC | Use a suitable high bitrate |
| Tutorial or screen recording | Match source resolution | H.264 or another compatible codec | Preserve text and interface details |
| Small file for sharing | Match the source or intended display size | H.264 | Balance file size against visible artifacts |
| Short social media clip | Follow the platform’s current recommendations | A supported format | Avoid unnecessary repeated compression |
| Old low-resolution footage | Test the original resolution and a moderate upscale | A compatible codec | Compare before and after carefully |
These are starting points, not guarantees. A video with rapid motion, complex textures, or a high frame rate may require a higher bitrate than a static scene.
Resolution and Bitrate Are Different
Resolution determines the number of pixels in each frame. Bitrate describes how much data is allocated to represent the video over time.
A 1080p video exported at an extremely low bitrate can show more compression artifacts than a well-encoded 720p video. Similarly, increasing the resolution without providing suitable source detail or encoding quality does not guarantee a clearer result.
For this reason, do not judge video quality by resolution alone. Check the source, compression, motion, and final appearance together.
Should You Use H.264 or HEVC?
H.264 is widely supported across phones, computers, browsers, and editing applications. It is often a practical choice when compatibility is important.
HEVC, also called H.265, can provide efficient compression in supported workflows, potentially reducing file size at a comparable visual quality. However, compatibility and hardware support vary, so it may not be the best choice for every recipient or editing workflow.
If a video does not play correctly, try a trusted player that supports its format or create a compatible copy from the original. Keep the original file in case the conversion changes quality or metadata.
Why Repeated Exporting Reduces Quality
Many common delivery codecs use lossy compression. Each new export can discard additional information, especially when the settings are aggressive or the video is repeatedly resized.
A better workflow is to keep the original source and editable project, perform your changes in one editing session, and export the final delivery copy once. If you need a different format later, return to the best source rather than repeatedly converting an already compressed output.
Common Mistakes to Avoid When Fixing Pixelated Videos
Trying too many adjustments at once can make it difficult to identify what helped. It can also introduce new artifacts that were not present in the original video.
Mistake 1: Increasing Resolution Without Checking the Source
Changing a video from 480p to 1080p increases its pixel dimensions, but it does not automatically restore the missing detail.
Upscaling can be useful for display compatibility or modest visual improvement, but it should not be treated as a complete repair for severe pixelation.
Mistake 2: Applying Too Much Sharpening
Strong sharpening creates hard edges and halos around objects. It can also exaggerate compression blocks and make noise more visible.
Start with a subtle adjustment and compare the result at the same size as the original. If the image looks artificially harsh, reduce the effect.
Mistake 3: Using Heavy AI Enhancement Without Reviewing the Result
AI tools can alter faces, text, patterns, and other details. An output that looks impressive at a glance may contain inaccurate features when inspected closely.
Always compare the enhanced version with the original. Preserve the source and clearly distinguish AI-enhanced footage from authentic original detail when accuracy matters.
Mistake 4: Exporting at the Lowest Quality Setting
Low-quality export settings can produce a smaller file, but they may introduce visible blocks and smearing.
Choose a quality level appropriate for the scene and destination. If file size is a concern, test a short export before processing the complete video.
Mistake 5: Repairing the Wrong Copy
If you have both the original and a compressed copy, editing the compressed copy may limit the final result.
Keep the original safe and use it as the starting point whenever possible. This is especially important for family recordings, work presentations, and videos that cannot easily be recorded again.
Mistake 6: Uploading Private Videos to Unknown Websites
Some online enhancement services require you to upload the entire video to their servers. This can expose sensitive personal or professional footage to additional privacy risks.
Before uploading, review the service’s privacy policy, retention practices, processing terms, and deletion options. For confidential recordings, consider a reputable local application that processes the video on your own device.
Mistake 7: Assuming Every Blurry Video Can Be Restored
A video recorded badly out of focus, with severe motion blur, or at an extremely low resolution may have lost important details permanently.
Enhancement can improve presentation, but it cannot guarantee that the original scene will become sharp. Sometimes the best result is a modest improvement rather than a complete restoration.
Practical Examples: Which Fix Should You Use?
The most effective method depends on the symptoms. These examples show how to select a solution without unnecessarily processing the video.
Example 1: A WhatsApp Video Looks Blurry
You record a clear video on your phone and send it to a friend. The received version looks blocky, especially around moving objects.
Likely cause: Compression during sharing.
Best approach: Compare the received clip with the original. If the original is clear, send it again using a supported high-quality option or as a file. Avoid trying to sharpen the compressed copy before checking whether the original is available.
Example 2: A YouTube Video Looks Pixelated
The video begins at a low quality, and the image improves after playback continues.
Likely cause: Adaptive streaming or insufficient connection speed.
Best approach: Check the playback quality menu, improve connection stability, and compare the video after it has buffered. If the uploaded source itself is low quality, selecting a higher setting may not make it truly sharp.
Example 3: An Old Family Video Looks Blocky on a Television
A video recorded years ago looks acceptable on a phone but becomes blocky when displayed on a large television.
Likely cause: Low source resolution, limited detail, or compression.
Best approach: Locate the original recording or a higher-quality transfer. If the original is unavailable, test moderate upscaling and light denoising. Keep the original unchanged because AI processing may generate details that were not captured.
Example 4: A Video Looks Worse After Editing
The original is clear, but the exported version has visible blocks in moving scenes.
Likely cause: Low bitrate, unsuitable export settings, or repeated lossy compression.
Best approach: Return to the editing project, check the output resolution and quality settings, and create a short test export. Avoid enlarging a low-resolution timeline unnecessarily.
Example 5: A Video Has Strange Colored Blocks
The clip contains unusual colors, missing sections, or visual glitches that persist across several players.
Likely cause: File corruption or a decoding issue.
Best approach: Test a second player and obtain a fresh copy if possible. If no clean copy exists, work on a duplicate with a reputable repair tool. Sharpening and ordinary upscaling are unlikely to fix underlying file corruption.
Example 6: A Face Looks Soft but the Video Is Otherwise Clear
The background looks acceptable, but the subject’s face lacks detail.
Likely cause: Focus problems, motion blur, compression, or a small subject enlarged through cropping.
Best approach: Return to the original and test mild sharpening. AI enhancement may improve the appearance, but check the facial features carefully because it may generate plausible rather than authentic details.
Frequently Asked Questions
1. How do I fix a pixelated video?
Start by comparing the video with its original file and checking whether the problem occurs in every player. If the original is clear, adjust streaming quality, change the sharing method, or re-export the video with suitable settings. If the source itself is pixelated, try mild sharpening, denoising, or upscaling.
2. How can I make a blurry video clear for free?
You can often improve a blurry video for free by locating a better original, applying careful sharpening, adjusting brightness and contrast, reducing noise, or using a free editor with suitable export settings. The best method depends on the cause. Severe blur and missing detail cannot always be recovered.
3. How do I fix pixelated videos on Android?
Open the video in your phone’s Gallery app, compare it with the original, and check whether the problem occurs in other players. For streaming videos, select a higher available quality. For compressed videos, request or recover the original file. If necessary, use a free editor for light sharpening or denoising.
4. How do I fix pixelated videos on an iPhone?
Check the video in Photos and compare it with the original recording. Verify that the original file has downloaded if it is stored in iCloud, and review the quality settings of the sharing app. You can also use a video editor to make careful adjustments and export the clip at a suitable resolution.
5. Can I fix a pixelated video online without installing software?
Yes, some online video editors and enhancement services offer browser-based editing or upscaling. Availability, file-size limits, export quality, watermarks, and pricing vary. Check the service’s current terms and privacy policy before uploading. For private or confidential footage, a trusted local editor may be a safer choice.
6. Can AI restore the original quality of a low-resolution video?
AI can sometimes make low-resolution footage look sharper by estimating additional detail, reducing noise, or improving edges. However, it cannot guarantee recovery of the original scene information. It may generate details that were never captured, so enhanced footage should not automatically be treated as an accurate reconstruction.
7. Why does my video look pixelated after sending it on WhatsApp?
The sharing method may compress the video to reduce file size and speed up delivery. Compare the received version with the original. If the original is clear, try an available high-quality media option or send the video as a file when supported. Avoid repeatedly forwarding already compressed copies.
8. Why do videos look blurry even when my internet is fast?
A fast connection does not guarantee that every video will play at its highest resolution. The platform may select a lower quality, the source upload may be limited, or the video may still be buffering. Check the manual quality settings and compare the stream with a downloaded copy when available.
9. Does increasing video resolution remove pixelation?
Not necessarily. Increasing resolution creates more output pixels but does not automatically recover lost information. Traditional upscaling can smooth the image, while AI upscaling may estimate additional detail. Both methods have limitations, particularly when the source is extremely pixelated or heavily compressed.
10. What is the best resolution for avoiding pixelated videos?
For many everyday videos, 1080p is a practical choice because it balances clarity, compatibility, and file size. Recording in 4K can provide more detail when supported and useful for cropping or large displays. The final result also depends on lighting, focus, compression, bitrate, and export settings.
11. What bitrate should I use to export a 1080p video?
For many H.264 exports at 1080p, a bitrate around 8 to 12 Mbps can be a reasonable starting point. Fast motion, high frame rates, and complex textures may require more. The appropriate value depends on the encoder and content, so test the output rather than relying on one number for every video.
12. Can VLC or another media player fix a pixelated video?
A different media player can help if the problem comes from decoding or playback compatibility. It generally cannot restore detail that was permanently lost through compression or low-resolution recording. If the video looks clear in another player, investigate the original application’s settings before editing the file.
13. Why does my video look pixelated on a big screen but clear on my phone?
A large display makes individual pixels and compression artifacts easier to notice. A phone’s smaller screen can hide some imperfections. Check the source resolution and compare the video at its intended viewing size. If the original has limited detail, careful upscaling may help, but it cannot guarantee a sharp result.
14. Can I fix a video that is extremely blurry?
The result depends on why it is blurry. Mild softness may respond to sharpening, while noise may improve with denoising. Severe motion blur, incorrect focus, or missing detail is much harder to correct. AI tools may improve the appearance, but they cannot guarantee a faithful reconstruction of the original scene.
15. How do I prevent videos from becoming pixelated in the future?
Record at a suitable resolution, use good lighting, keep the camera steady, avoid excessive digital zoom, and retain the original file. When editing, choose appropriate export settings and avoid repeated lossy conversions. When sharing, use a high-quality option or send the original file if the app supports it.
16. Is it safe to upload personal videos to an online enhancer?
It depends on the service and its data-handling practices. Before uploading, review how files are stored, processed, retained, and deleted. Avoid sending sensitive recordings to unknown services. If privacy is important, consider reputable software that processes the footage locally on your device.
17. Why does my video have blocks, but the audio plays normally?
The audio and video streams are encoded and processed separately. A damaged video stream, decoding issue, incomplete transfer, or compression problem can affect the picture while leaving the audio usable. Try another compatible player and obtain a fresh copy. If the issue persists, investigate file repair rather than applying ordinary image enhancement.
18. Should I convert a pixelated video to 4K?
Converting a low-resolution video to 4K increases its dimensions but does not automatically add authentic detail. AI upscaling may improve the appearance in some cases, but the results vary. If you need a larger file for compatibility, upscaling can be useful; if your goal is genuine detail recovery, it may not meet your expectations.
19. Can repeated video compression cause permanent quality loss?
Yes. Many common video formats use lossy compression, which discards information to reduce file size. Repeated exports and sharing can introduce additional artifacts, especially when using low-quality settings. Preserve the original and make your final export from the best available source whenever possible.
20. What should I do if a video remains pixelated after every fix?
First, verify that you are working with the highest-quality source available. Test the file in another player and check for corruption. If the video is simply low-resolution or heavily compressed, try modest enhancement and compare the result with the original. If important detail was never captured or has been permanently removed, complete restoration may not be possible.
Conclusion
Learning how to fix pixelated video footage starts with identifying the source of the problem. A video that looks poor because of streaming quality needs a different solution from one that was compressed during sharing, exported at a low bitrate, recorded in poor lighting, or damaged during transfer.
Start with free methods: check the original file, test another player, select a higher streaming quality, and review the sharing or export settings. If the source itself is soft or low-resolution, try careful sharpening, denoising, or AI upscaling while keeping realistic expectations.
Most importantly, preserve the original recording and avoid repeated compression. These habits give you the best chance of maintaining video quality, whether you are editing a clip on Android, sharing footage from an iPhone, or repairing a video on Windows or Mac.